So, you thought your transmission woes were over. GM rebuilt your transmission after the infamous wave plate failure and you figured you were good for another 100K. Wrong, suddenly you have the familiar check engine light and the transmission won't shift past 2nd gear. Ahhhhh. You'll have another P0700 code along with some sort of shift solenoid failure. In my case, it was a P0752, but there are several switches on the module that could fail and trigger similar codes.
This is another flaw in the GM transmission that may have been exacerbated by the wave plate failure. The Transmission Electro-Hydraulic Control Module, often called TEHCM or TCM, is another non-robust part in the terrible transmission on these things. The TEHCM is a multi-purpose part that acts as the transmission control computer along with some sensors and shift solenoids. It lives inside the transmission and swims in the transmission fluid. So, the metal particles flowing through your transmission during the wave plate failure, or any overheating conditions, will weaken the TEHCM also.
GM doesn't always help on these, so you're probably on your own to pay for the repair. My dealer wanted $1400 for the repair. Coincidentally that's the same amount I had to pay out-of-pocket for the wave plate failure rebuild. Even with GM's help, this is an expensive transmission to get 120K miles out of.
Let’s jump right to the issue:
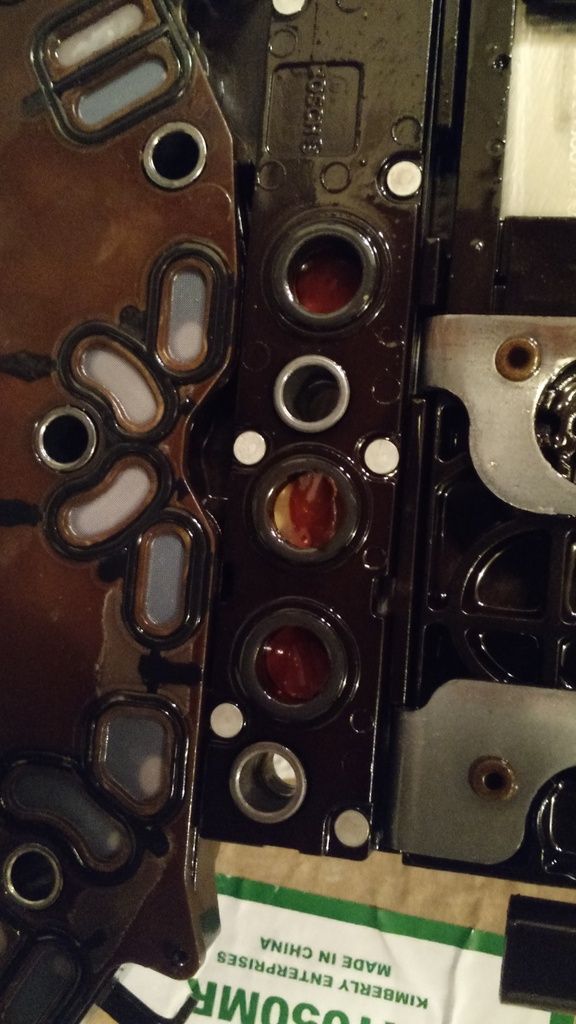
The shift solenoids (or switches depending on the document you’re reading at the time) just kind of fall apart. To replace these simple and inexpensive parts, you also have to replace the more expensive parts contained in the rest of the module. GM charges $650 for a TEHCM and the dealer will want $1400 or so for the entire repair. The repair involves replacing the module, and some gaskets, and reprogramming the TEHCM. Earlier this year (2015), Dorman came out with a plug-and-play kit to do the repair yourself. The retail price of the Dorman pre-programmed TEHCM is around $300. You’ll also need about $50 worth of transmission fluid and optionally some gaskets. I leave the gasket question up to you. I didn’t replace them, but I will talk about them during the discussion.
Can you do it?
This is a fairly simple procedure. If you have managed to replace a headlight bulb in this thing you’re definitely good to go. I’d say it is on par with a brake job in complexity. If you can’t change the air filter, pay the dealer.
Alldata says it's a 3.1 hr procedure (2.2 if under warranty). It took me around 4 hrs. with a couple of breaks.
If you attempt this, be prepared. You, the ground, and your tools to be soaked in transmission fluid. It never stops coming.
Next 2 Posts:
- - What you need
- - Basic Procedure